Showing posts with label looking glass. Show all posts

Thursday, November 10, 2011

Goodwill Hunting with bonus tutorial

I heart goodwill.  Like super big red glittery ruffeldy puffy {heart} goodwill.  I heart it as much as I heart driving around looking for trash people put by the road for me to stuff in my car to take home and make something new out of.

I like other thrift stores too (notice I use the word like).  I know a lot about goodwill and their pricing too.  I know there's one by me that charges more than others because apparently they think THEIR donated stuff is worth more than other stores donated stuff.  It's ok, I still shop there, but I'm careful what I buy.  I know where four goodwills are within driving distance.  I know there's an awesome one across town that I go to when I head that way (it's like 45 minutes from me).  I also know that they open at 9 am.  Perfect timing for me when I have to take kids to school at 8:30, I can stop and get a coffee and be there when they open.  Genius.  

I have been to all four GWs near me this week.  Hm..what does that say about me?  Nothing else to do it seems.  That's so not true.  I'm getting ready for Christmas (first time I have EVER been ready to decorate so early - thanks Pinterest!) and my shop needs more stuff! I thought I'd share a few things I've found this week.

First - this nifty lamp.  Lovely Terrible phone pics here, sorry!  White ceramic barrel base.  Wooden stem (is it a stem?  who knows.  looks like a stem to me!).  I thought I would cover the flat part of the base in some awesome damask.  Maybe paint the stem a nice bright color - maybe teal or fuschia, and a new shade.  I found a couple shades also, but neither worked with this shape.  This one needs a drum shade - nothing with even the tiniest of taper, trust me, I tried.


This (again, wonderful pic) is the shade I picked up.  Medium gray with a little texture.  Perfect shape and size!  Here's the lamp is trying it on for a fitting ;)


Three silver candlesticks.  While they all look similar they do not match.  I also got some glasses to make into mercury glass and put on the top of these.  I thought they'd look nice on a Christmas mantle.


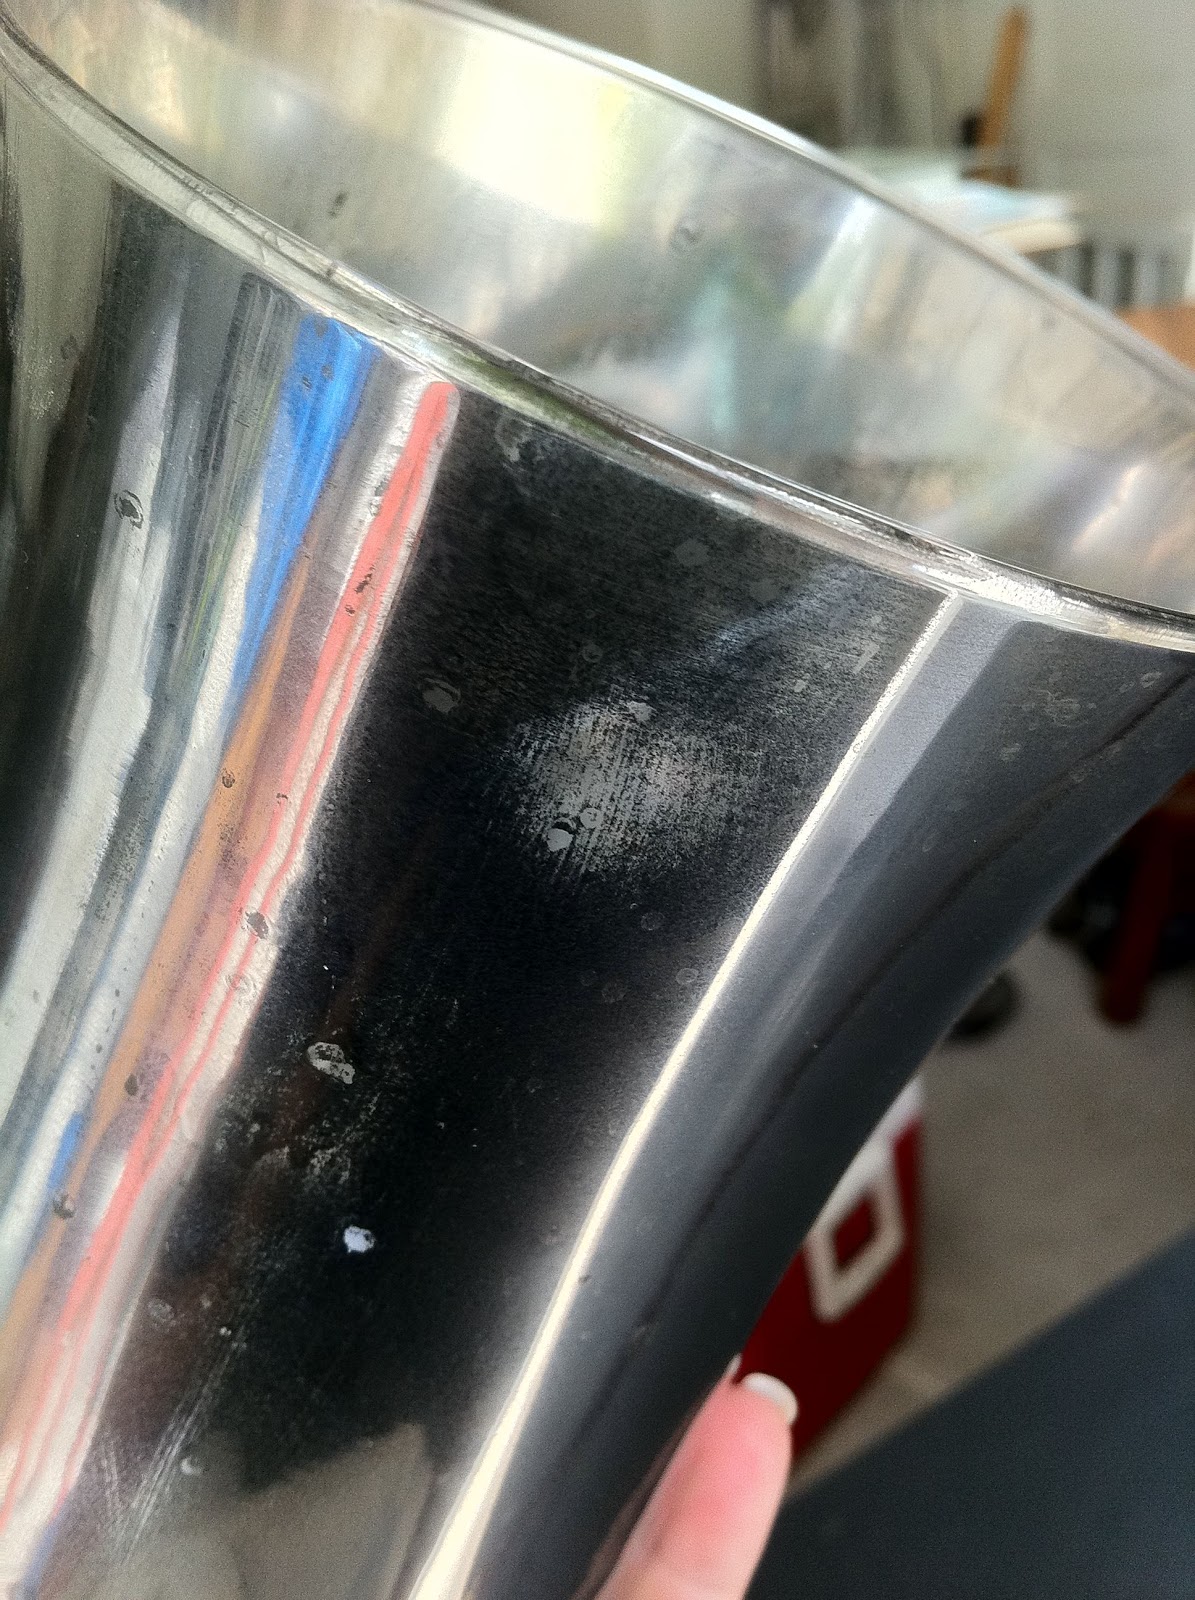
Then I got these glasses.  They're the perfect size for the candle holders.  I'm trying to get the mercury glass technique to work on them.  Honestly, I think I have a bad can of looking glass spray paint.  This can isn't working at all like the others have.  I need to go get a new can and try this.  Because if I hadn't done mercury glass before (see here) I'd have given up by now!!!


See?  Fits nicely.


Two drum shades and a stick lamp.  The chocolate shade would be perfect for a pendant light.


And a bonus tutorial for you :)  Yay!  I know you're SUPER excited now!

I also picked up these candle holders (the pic shows one, I promise there really are two).  Wouldn't they look great on a mantle?


I mean, you know WITHOUT the candle holder thing on top and then painted white?  Maybe even with some Christmas lights poking through?  I thought they were Awe. Some!  So, here's how I did it.  Take your hammer.  Beat the metal round thing on top.  Beat it some more.  Wait - a few more times.  All around the circle.  If it starts bending down, then beat it from the bottom.  There's nothing nice and sweet about taking this bad boy apart.  Mad at someone?  Great!  Use it to beat this thing apart.  Eventually the welds (there are 5!) will break and the circle will come off.  Then you're left with this:


Throw the circle in the trash.  Save the tree.


Get your spray paint out.  Paint them.  I didn't want mine perfect.  I actually liked them the way they were, but I wanted them white, so I painted.  Here they are.  Sitting in my garage waiting for their place on my mantle.  :)  yay!  I think they're so pretty.  They'd be awesome in a bright color too.


And one two last photos. I'm raising my boys right - already painting furniture! I'm so proud.  lol.


Go forth and create!

Friday, October 28, 2011

Mercury Glass Chalkboard Tutorial

Or rather, Mercury Glass Chalk Ink Window Tutorial (or some other nonsense like that).  Let's just stick with Mercury Glass Chalkboard Tutorial to keep it simple.

Some of you may remember this post where I showed you how I created my faux mercury glass.  Well, in this tutorial I've combined my love for chalkboards with my love for mercury glass to make a mercury glass chalkboard.  What is a mercury glass chalkboard? Let me show you:


For this 'chalkboard window' I used a vintage cabinet door that came out of a 1920's bungalow.  I'd had it sitting in the garage a while and couldn't decide what to do with it.  Finally I decided to do the single pane in mercury glass and the smaller panes I will add some photos of my kids after I get them printed.  I painted the frame itself in ASCP graphite and distressed it heavily.  Eventually I would like to hang it from a ribbon that goes through the hinges as well, but that's for another time.

To get this effect, I basically followed my instructions for the faux mercury glass I posted previously. I will do a quick run through here - I did the tutorial on an extra piece of glass I had laying around.  

I started with clean(ish) glass. 


Sprinkled it with a little water:


Lightly sprayed about 4 coats of Krylon's looking glass spray paint.


This is what it looks like when you first spray the paint.  When the surface is all even then you can spray the next coat.  Since it's laying flat you don't have to worry about runs as much, but still do light coats.  Blowing helps dry it some :)


Close up of the painted over water droplets:


After the paint is dry (took about 7 minutes or so) I very GENTLY wiped with a slightly damp very soft cloth.  Nothing rough, no paper towels or anything like that.  A piece of an old t-shirt would be perfect.  First I gently wiped one direction, then the other.  After I wiped the droplets off, I used a dry corner and carefully dried the rest of the water off.  The looking glass paint is very delicate at this stage, I'm sure if you let it dry overnight first it would be better, but I like fast projects.


Then I very LIGHTLY sprayed some Rustoleum Hammered finish in gray to give the holes some depth.


Lastly, I sprayed the entire back in flat black:


Finished glass inside (it's so hard to photograph this stuff so you can really see the detail!!)


Now, here's the actual project on the old cabinet door:


You'd probably be able to see a black chalk ink marker better, but I only have white on hand right now.  I bought my chalk ink markers are Michael's but there's a website where they have a rainbow of colors. 

This technique would be perfect for thrift store frames.  I've also used it on thrift store frames then used the frames on a table top as a tray.  You could hang it on a wall and add hooks or knobs and use it as a message center for keys or coats.  You're only limited by your imagination and 'you only fail if you fail to try!'

Update, what do you think about it set up like this?


Go mercury glass something this weekend and send me the link!
Enjoy!


As seen on:

Wednesday, October 12, 2011

Faux Mercury Glass Tutorial

I promised ages ago the other day I would put together a tutorial for the mercury glass I made:


Little did I know that after promising that Hobby Lobby would promptly sell out of Krylon's Looking Glass spray paint and not have any for weeks!!!

Finally I was able to get some, yes, I bought TWO cans this time.  I didn't want to take any chances!!!  The vases are still drying in the garage so I will take some nicely staged shots to add to this tut when everything is dry.

This tutorial is extremely pic heavy!  Beware!

Supplies needed:
glass vase of some kind.  the ones above came from goodwill, the ones below were a whopping $3 at Ross. 
water (sink or bowl or water hose, whatever works)
Krylon's Looking Glass spray paint.  ($11.99 at HL, make sure you use a coupon!)
Flat black spray paint
clean, soft, rag
cardboard or something to set the vase(s) on to dry overnight
Rustoleum Hammered Metal spray paint in gray (optional)

Ok, let's get started.  Gather your supplies.

vases (note how super clean they are):


First hold your vase by the bottom and wet your fingers. (this sounds interesting, right?)  You want to 'splash' a little water inside the vases to make droplets.  Some people use spray bottles, I find that using your hands makes it a little more random.  You want enough water so it doesn't dry before you start painting, but not so much that it runs.  If it starts to run dry it out and start over.

Vase splashed with water:


Now, go outside to your dedicated mercury glass spray paint area aka. chimney of kids' play house.  This looking glass spray paint is...weird compared to other spray paints.  It's really runny (watery) and smells just...strange.  Wear a mask, definitely.

Hold the vase with the water droplets (again, not inside the house!) and very, very lightly spray inside the vase.  It will take 5-6 coats to get the right coverage.  The paint will run, that's ok, but you don't want ALL of it to run.  I let them sit upside down between coats and wait about, oh, a minute or so before the next coat.

Coat 1:


Coat 2:


Coat 3:


Coat 4:


Coat 5:


You can see how each coat just builds and builds.  The reflectiveness comes through when you can start to see my phone case in the reflection ;)

After you have the coats painted let them sit upside down overnight to dry (I like to use a fancy cat litter lid in the corner of my very dirty garage):


Fast forward to the next day.  The looking glass spray paint is pretty delicate inside the vases.  If you aren't careful you can rub it all off.  Using your soft dry rag, carefully wipe inside the vases.  The goal here is to wipe off the loosened paint where the water droplets were.  You can also wipe off some of the paint if you got it too thick when you were painting the layers.


Now, the vases look nice like this (but still aren't stable, will wipe off) but they just look like silver vases.  One of mine was covered well with paint, the other one was not coated as well.  So, I decided to use a little of the 'hammered metal' spray paint (gray) I had on hand to fill in some of the bare(ish) areas.  I figured it was silverish with some black so it would work.  I added a light coat to each of the vases.  Much better but still not quite finished.


To make this look like real mercury glass you need it to be black inside.  These vases are pretty to look at but really don't make good candle holders because they're black inside.  But like I said, pretty to look at! :)

One light coat of flat black and voila! Faux mercury glass:  (see the overspray on the top edge?  wipes right off!)


If you want this to be super scratch resistant (because at the end of the day this is still just spray paint on glass, it can be scratched) then you should paint the inside with black gloss enamel and let it dry.  It takes several days to cure completely.

If you have any questions leave me a comment or send me an email!  Enjoy.  Happy faux mercury glass making!

Related Posts Plugin for WordPress, Blogger...