I had this stick lamp that I picked up from goodwill. You know what I mean by stick lamp, right? I'm sure there's a real name for them, but basically it's just a stick. Square metal base and it's just a stick up to the part where you put the lightbulb in? So, I wanted to pull some blue up from the rug that's on the floor so I decided to paint this lamp base blue (more blue-gray) but I needed a shade.
I had an ugly drum shade sitting in the closet and I pulled it out thinking I needed to recover it somehow to go with the lamp (and my living room).
When I went to check my fabric stash that skirt was sitting there so, of course, I had to see if it would fit the shade and what it would look like. Believe it or not that skirt fit that shade perfectly. Like it was meant to go on there. All I had to do was take the a-line part out of the skirt and then glue it to the inside of the original shade. I took some pictures so I could write a little how-to, but before we get into that, here's the finished product:
Here's how to make your very own ruffled lamp shade. First you need a shade to recover and a skirt that fits it.
The skirt just zipped right up around the shade. Here's the it is all fitted together.
First thing I did was take in the excess to take the skirt basically from an a-line to a pencil skirt, follow me? Nothing fancy, just put the skirt on the shade and gathered it around the bottom and kinda marked what would make it fit best and how far up I needed to go then sewed a straight line. I didn't cut it or anything afterwards, just left it as is.
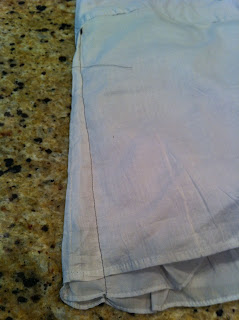
Then I knew I'd have to cut some excess off the top of the skirt so I marked how much I'd need to trim from the waistband and that's the vertical line sewn here. I sewed it all the way around.
I even sewed straight through the zipper (back and forth several times over the zipper so it won't come apart).
After that was sewn all the way around I cut my skirt along the three pencil lines (careful not to cut through the sewn line).
Then I cut right above the second part I sewed that shortened the waistband (confused yet?)
Again, straight through the zipper. (make sure you're cutting on the throw away side of the sewn line!)
Now all that really confusing cutting is done, slip the skirt back over the shade and it should look like the picture below. This is from the inside of the shade. The little box I sewed goes around the braces and the part hanging down is where I shortened the waistband so there wasn't so much excess fabric.
Here's a view from the outside at this point:
After that all I did was roll the waistband twice and hot glue it to the inside of the shade like this:
I let the bottom part of the skirt just hang, in fact, it's about four inches longer than the original shade.
It makes me chuckle to see it lit up because it looks funny.
But, hey, it's my lamp right? I think it's awesome :) And I use it every day.
Before (before shade and new paint job):
After:
Enjoy! Go forth and be creative!

As seen on:


Oh my goodness, what a cool transformation! You are a very clever and thrifty girl!
ReplyDeleteThis is amazing~ love the transformation- you are so creative!! Sharing this on FB- thanks for sharing at Feathered Nest FRiday!
ReplyDeleteVery cute and great use of the skirt! I bought a skirt on sale at Target too knowing it would become a project one day!
ReplyDeleteTracey
Turned out so cute! Great tutorial. Thanks for linking up!
ReplyDeleteSo cute and you didn't have to slave away making the ruffles! Great idea, thanks for sharing this week at Primp.
ReplyDeleteTHIS IS REALLY AWESOME!!! :) I HAVE A RUFFLED SKIRT AT HOME I COULD USE FOR DIY PROJECTS! THANKS FOR SHARING! I'M A NEW FOLLOWER!
ReplyDeletePLEASE VISIT MY BLOG TOO! HTTP://THECHICREGENCY.BLOGSPOT.COM/
Ha! That's awesome! I'll have to keep my eye out for cute skirts on clearance!! Thanks for the awesome idea!!
ReplyDelete